How to Share Files through OneDrive
Creation date: 7/13/2022 10:13 AM
Updated: 4/30/2025 8:44 AM
OneDrive can be used to share files with others. This knowledgebase article will provide step-by-step instructions on how to share a file from your computer to OneDrive as well as how to share that file with others.

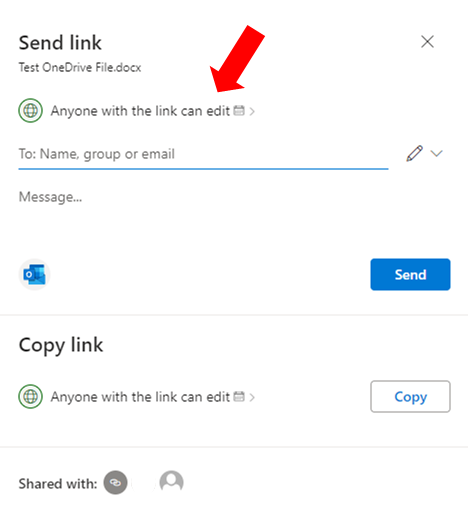
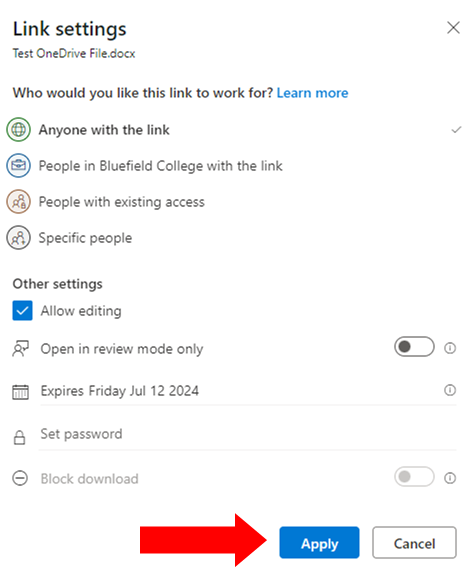
Once you've clicked "Share" you will be presented with the share settings prompt. From this screen, you can modify the recipients of the document as well as modify the access restrictions should you choose to include any. 
Should you choose to include access restrictions, Select or modify any such restrictions and click "Apply" to save your selections.

Review your document settings and share the document link.
1: Accessing your OneDrive Account
- Access your OneDrive account at the following link: https://onedrive.live.com/about/en-us/signin/
- Log in using your Bluefield University email address
2: Upload the File you Want to Share
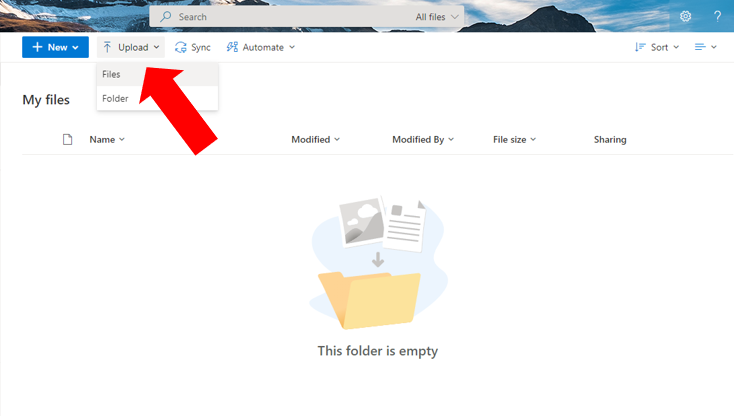
- Click "Upload" at the top left and select "Files"
- The newly uploaded file defaults to "private". This needs to be changed so others will have access to it. We'll share the file in the next step.
- Select the document you wish to share and click "Share" to modify the document's access settings OR "Copy Link" to share the document with unrestricted access.


